How to Delete Fitments for a Specific Part in PCFitment Europe
If you need to remove one or more fitments from a specific part in PCFitment Europe, you can do it easily in just a few steps. Follow the instructions below to delete fitments safely and quickly.
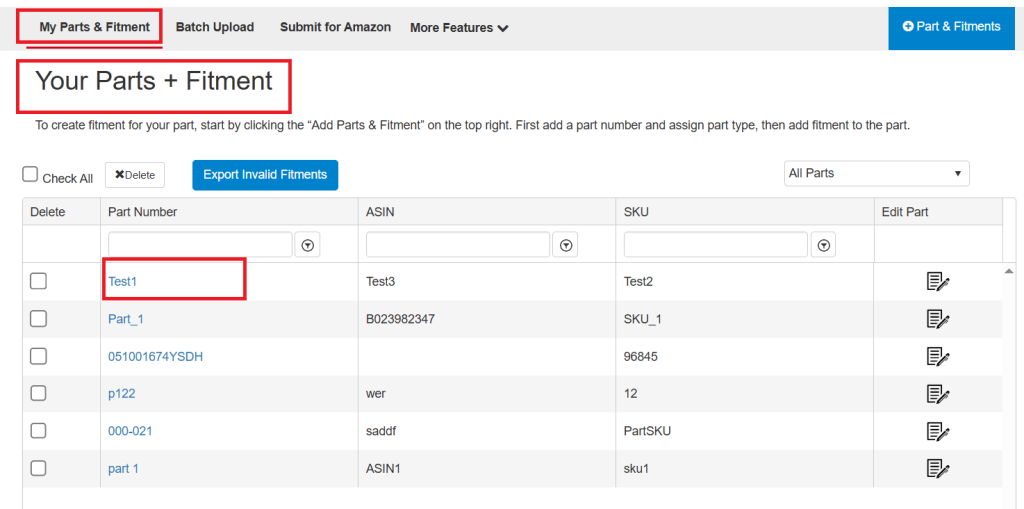
Step 1: Open the My Parts & Fitment Dashboard
- Log in to your PCFitment Europe account.
- From the top navigation bar, click on My Parts & Fitment.
- Locate the part number you wish to edit and click on it to open the details.
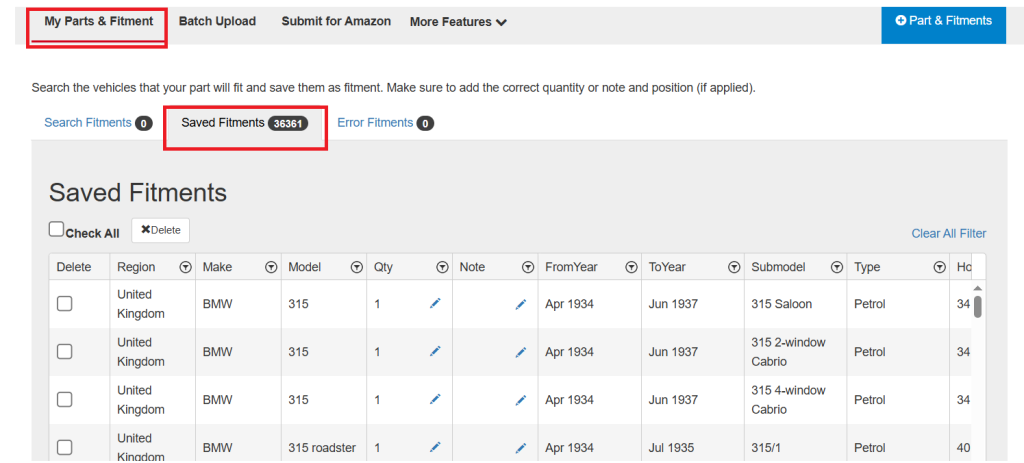
Step 2: Go to the Saved Fitments Tab
Once you open the part, you’ll be directed to the Part Information page.
At the bottom, click on the Saved Fitments tab to view all the existing fitments for that part.
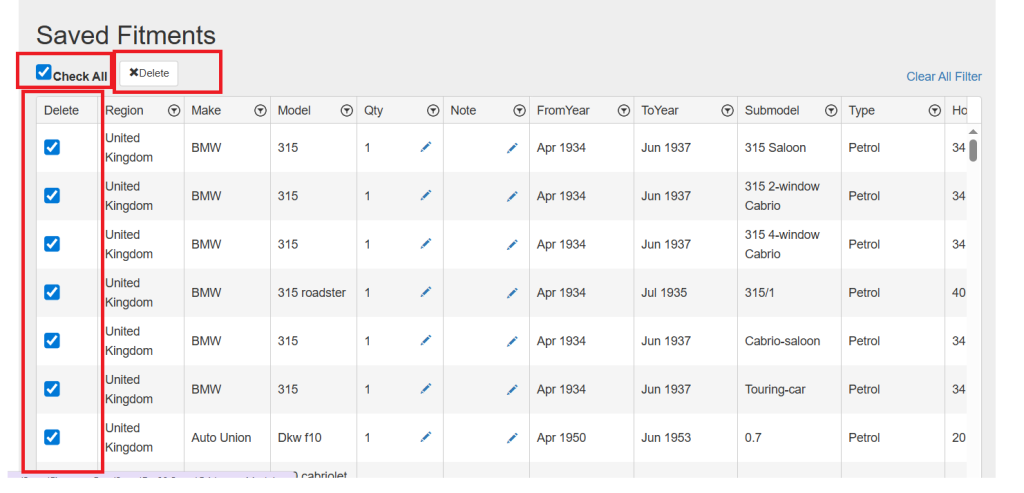
Step 3: Select and Delete Fitments
You’ll now see a list of all saved fitments linked to this part.
- Tick the box next to the fitment(s) you want to delete.
- To remove all at once, click Check All.
- Then click the Delete button to confirm.
Important Reminder
Once you delete a fitment, it cannot be recovered, so please review carefully before proceeding.
After deletion, make sure to resubmit your updated fitment data to Amazon. The synchronization may take 3 to 5 days to reflect the changes.
That’s It! ✅
Deleting fitments in PCFitment Europe is fast, simple, and reliable.
If you have any questions or run into issues, our support team is always ready to help.